1.27.2010

schnitzel and mushroom spaetzle

my brother served his mission in Germany and when he came home I had all kinds of questions for him about the food there. the only German food venture I had during culinary school was making spaetzle and I loved it. I mean, LOVE at first bite. my brother happened to agree about the deliciousity that is spaetzle and I've been meaning to make some ever since. so, that's what I did this weekend. I made a traditional German/Austrian meal of schnitzel and mushroom mustard spaetzle (thanks Tyler Florence for the inspiration). I will say that this meal was hard work for me. if I hadn't been balancing meat pounding and pushing spaetzle batter through a colander with nursing a hungry three month old baby by myself, I doubt it would have been such a labor of love. so don't be daunted by my griping but I probably will only make this on special occasion (and also because it's not the most low calorie meal out there - in fact, quite the contrary but it was delicious).

Tyler's Ultimate Schnitzel
4 boneless skinless pork loin chops (about 5 - 6 ounces each)
1 1/2 cups all-purpose flour
kosher salt and pepper
2 large eggs
1/2 cup milk
4 cups plain dried breadcrumbs
2 Tablespoons olive oil
2 Tablespoons butter
1 teaspoon thyme (or one spring fresh thyme if you have it)
lemon wedges
Place each chop between two sheets of plastic wrap and gently pound them with a meat tenderizer with the flat side (or, if you don't have a meat tenderizer like me, carefully pound with a rolling pin but be sure to do it evenly).
Put the flour in a shallow dish and season with salt and pepper. Whisk the eggs and milk in another shallow dish and season with salt and pepper. Pour the breadcrumbs in a third dish and season with salt and pepper. Lightly dredge the pounded pork chops in the flour and shake off excess. Then quickly soak in the egg and dredge evenly in the breadcrumbs to coat.
Lay the breaded pork chops in a single layer on a plate and refrigerate for about 10 minutes.
Heat the oil and butter in a large nonstick skillet over medium high heat. Add the thyme and gently lay the chops (two at a time) and cook until they are golden brown and crispy and cooked through. Remove to paper towels to drain. Season with salt and serve with lemon wedges (which really make the schnitzel taste so much better).
Mushroom Mustard Spaetzle
1 cup all purpose flour
1 teaspoon salt
1/2 teaspoon black pepper
1/4 teaspoon nutmeg
2 large eggs
1/4 cup milk
In a large bowl combine the flour, salt, pepper and nutmeg. Whisk together the eggs and milk in another bowl. Making a well in the center of the dry ingredients, pour the wet ingredients in and gently stir together until smooth. It should be thick and smooth. Let sit on the counter for 15 minutes (this is a good time to pound out your meat and cut up the mushrooms).
Bring 3 quarts of salted water to a boil in a large pot over medium heat. Reduce the heat to simmer. To form the spaetzle, hold a large holed colander over simmering water and push the dough through the holes with a spatula. Do it in batches and stir after they drop in the pot so they don't stick together. Cook for 3 or 4 minutes until they float to the top. Drain and give a quick rinse in cold water and set aside.
3 Tablespoons butter
2 Tablespoons olive oil
1 teaspoon thyme
1 1/2 pounds mushrooms (I used button but I think crimini would have been even better)
2 cloves garlic, minced
kosher salt and pepper
1 cup heavy cream
2 Tablespoons whole grain mustard
Add 1 Tablespoons of butter and the oil to a large skillet over medium heat. Add the cooked spaetzle and saute until lightly browned, about 3 minutes. Remove from the pan and set aside. Set the same skillet back over medium high heat and add a bit more oil and the remaining 2 Tablespoons of butter. Add the thyme, mushrooms and garlic and saute until golden brown. Season with salt and pepper. Add the cream and mustard and let cook until thickened, about 3 minutes. Fold in spaetzle. Serve with schnitzel.

1.17.2010

Pork Chops with Golden Applesauce

When I had my baby one of my good friends brought over dinner a few days after we returned home from the hospital. I wasn't expecting much - not because I thought she didn't know how to cook - but because most of the meals we had received that week were pretty standard. You know . . . typical crockpot fare or store-bought meals. So, when I tasted Stephanie's apple pork chops with garlic mashed red potatoes and a delicious green salad with sugared pecans I thought I had died and gone to heaven.
A few weeks later, I was still thinking about that meal and wondered, "Was it really that good or was I just starved for a decent meal?" When I saw her at church today I asked her to send me the recipe. She obliged. I made it. And it was still really good. Way good.
And yes, we serve very American sized portions around here.
4 apples (I used Gala), peeled and chopped
2 teaspoons lemon juice
2 ounces golden raisins (eye ball it - sidenote: I don't typically love cooked raisins and if you're the same, give this a shot anyway. The cook so long and tender that they almost become part of the sauce and give it a perfect sweetness.)
1 inch piece of fresh ginger root, peeled and whole
3 Tablespoons light brown sugar
2 cups apple juice or apple cider, plus a splash more for deglazing pan
1/2 teaspoon ground cinnamon
1/4 teaspoon freshly ground nutmeg
2 Tablespoons olive oil
4 (1 inch thick) center cut boneless pork loin chops, 6 - 8 ounces each
2 Tablespoons butter
Combine first eight ingredients in a medium saute pan over medium high heat and cook until a chunky sauce forms, 10 - 12 minutes, stirring occasionally. If sauce begins to spatter as it bubbles, reduce heat back a little but it should be allowed to reduce and form quickly. Once apples are soft and the sauce forms, remove from the heat.
Heat a large nonstick skillet over medium high heat. Add olive oil to the pan. Season pork chops on one side with salt and pepper. Using a pair of tongs, add chops to the hot skillet seasoned side down. Season the opposite side of the chops with salt and pepper. Brown and caramelize the chops 2 minutes on each side, then reduce heat to medium and cook another 5 - 6 minutes, turning occasionally, until juices run clear (sidenote: my chops were quite thick so I actually butterflied them after getting a nice crust on both sides first). Remove chops from heat and let them rest a couple of minutes to let the juices redistribute. Deglaze the pan with a splash of apple juice and 2 Tablespoons of butter. Let cook down a little and pour pan sauce over the chops. Remove ginger from the sauce and top the chops with a generous portion of the warmed apple sauce.
P.S. I served this with broccoli which I broiled in the oven at 400 degrees coated in a bit of olive oil and salt and pepper until tender. Then I grated on some Gruyere cheese and let broil just a minute more until melted.

1.14.2010

southwestern brisket tacos with red cabbage slaw

I made smitten kitchen's Southwestern Pulled Brisket with red cabbage slaw the other night for dinners and it was good. I did make a couple of alterations so read on.

3 pounds beef brisket (or pot roast)
kosher salt
freshly ground black pepper
2 Tablespoons olive oil
5 cloves garlic, peeled and smashed (use the back side of your knife)
1 large spanish onion, halved and thinly sliced
1 Tablespoon chili powder
2 teaspoons cumin
1/4 cup apple cider vinegar
1 1/2 cups water
1 (14 1/2 ounce) can whole tomatoes, with juice
2 bay leaves
1/4 cup molasses

Season the beef with salt and pepper and heat oil in a large saute pan over medium-high heat. Once hot, add beef and sear on all sides until evenly browned. Transer meat to the slow cooker (or crock pot, whatever you fancy). Leave saute pan on heat.

Add garlic, onions, chili powder and cumin and stir for about one minute. Add vinegar and boil until it's almost gone, scraping the bottom of the pan. Stir in water and pour the mixture over the brisket. Crush the tomatoes through your fingers over the beef, adding juices as well. Add bay leaves and molasses. Cover and set the slow cooker to low and cook for 8 - 10 hours (I did 10).

Serve as tacos with warmed corn tortillas, red cabbage slaw (recipe below) and sour cream.

Red Cabbage Slaw
1 cup green onions, coarsely chopped
1/4 cup red wine vinegar
1 jalapeno pepper
2 Tablespoons mayonnaise
salt and pepper
1/2 cup olive oil
1 small head red cabbage, shredded
1/2 small red onion, thinly sliced
1/4 cup chopped cilantro

Blend green onions, vinegar, jalapenos, mayonnaise, salt and pepper in blender (or this is a GREAT time to pull out your Magic Bullet) until emulsified. Place cabbage and red onions in a large bowl and pour dressing on top. Mix until combined and fold in cilantro. Season with salt and pepper to taste.

braised cod with roasted tomatoes and zucchini

Braising is one of my favorite cooking methods. It's easy and almost always produces a moist and flavorful dish. Plus, if you're like my husband, there's usually some sort of broth or sauce to dip your crusty bread in.

Last night I made Braised Cod with Roasted Tomatoes and Zucchini. I used cod because I can afford cod - not because it's my first choice. If I could have found halibut for less than $12 a pound then I would have used that. However, cod worked fine.

2 (7 ounce) cod steaks, skin and bones removed
1 teaspoon dried oregano
kosher salt and pepper
1/8 teaspoon cayenne pepper
3 ripe tomatoes, cut into 1/2 inch thick slices
2 medium zucchinis, cut into 1/4 inch slice
1 1/2 teaspoons olive oil
2 cloves garlic, minced
flat leaf parsley, for garnish

Sprinkle both sides of cod with oregano, salt, pepper and cayenne pepper. Sprinkle the tomato and zucchini slices with salt and pepper as well.

Heat olive oil in a large saute pan over high heat. When hot, add zucchini and saute until browned on one side (about 1 minute). Flip over and saute until brown on the other side and tender. Remove zucchini from pan and divide among two serving dishes.

Add cod steaks and tomatoes to the saute pan (adding a bit more olive oil if necessary). Cook until cod steaks are golden on the bottom (about 4 minutes). Turn cod and tomatoes over and add 1 cup of water and the garlic. Bring liquid to a simmer and let cook until the cod feels firm (about another 4 minutes). Place cod, tomatoes and broth of the zucchini and garnish with parsley. I also suspect some freshly grated parmesan reggiano on top would be a delicious addition but we're trying to cut down on extra calories around here.

10.06.2009

baked cod

I know that just hearing the word “casserole” probably makes your stomach gurgle with the thought of cream of chicken soup and mayonnaise (I’m already nauseous) but this is no casserole. There’s no cream, no canned soup and certainly no mayonnaise. There is, however, some delightful Gruyere cheese baked on top and I just can’t say no to Gruyere cheese. I served this up with some Haricot Verts (French green beans) lightly steamed and then finished off in a sauté pan with a swirl of olive oil, garlic and sea salt. I am making this one again and again.

Baked Cod


2 tablespoons extra-virgin olive oil, divided
2 medium onions, very thinly sliced
1 cup dry white wine (I used non-alcoholic wine from Whole Foods which is the greatest thing ever)
1 1/4 pounds cod, cut into 4 pieces (Trader Joe’s is a great place for this – frozen)
2 teaspoons chopped fresh thyme
1/2 teaspoon kosher salt
1/2 teaspoon black pepper
1 1/2 cups finely chopped whole-wheat artisan bread, (about 2 slices)
1/2 teaspoon paprika
1/2 teaspoon garlic powder
1 cup finely shredded Gruyere cheese

Preheat oven to 400°F.

Heat 1 tablespoon oil in a large ovenproof skillet over medium-high heat. Add onions and cook, stirring often, until just starting to soften, 5 to 7 minutes. Add wine, increase heat to high and cook, stirring often, until the wine is slightly reduced, 2 to 4 minutes.

Place cod on the onions and sprinkle with thyme, salt and pepper. Cover the pan tightly with foil; transfer to the oven and bake for 12 minutes.

Toss bread with the remaining 1 tablespoon oil, paprika and garlic powder in a medium bowl. Spread the bread mixture over the fish and top with cheese. Bake, uncovered, until the fish is opaque in the center, about 10 minutes more.

french breakfast puffs

When I was growing up my older sister, Alice, made French Breakfast Puffs on special occasions – and heavens, I loved them. I mean, who doesn’t love muffins with cinnamon sugar stuck to melted butter on the tops? Mmmm, muffin tops. Have you seen that episode of Gilmore Girls when Sukie brings Loralei a basket full of muffin tops to request a favor? I bet they were so good . . . I just confessed that I have seen every episode of Gilmore Girls . . . well, actually NOW I have.

ANYway.

Even though I planned on making cinnamon rolls during General Conference this weekend (and then realized I only had 3 cups of flour left) I decided to make these. They did not disappoint. It’s been a while and this isn’t the original recipe my sister uses but I personally love the tanginess of the buttermilk.

French Breakfast Puffs


7 tablespoons unsalted butter, at room temperature
2/3 cup sugar
1 egg
1 1/2 cups all-purpose flour
1 1/2 teaspoons baking powder
1/2 teaspoon baking soda
1/2 teaspoon salt
1/2 teaspoon freshly grated nutmeg
1/2 cup buttermilk
1 1/2 teaspoons vanilla extract

For the heavenly TOPPING:
2/3 cup sugar
1 tablespoon ground cinnamon
6 tablespoons (3/4 stick) unsalted butter, melted

Preheat an oven to 350°F. Grease 12 standard muffin cups with nonstick cooking spray.

To make the muffins, in the bowl of an electric mixer fitted with the flat beater, combine the butter and sugar and beat on medium speed until light and fluffy. Add the egg and beat well until pale and smooth.

In another bowl, stir together the flour, baking powder, baking soda, salt and nutmeg. Add to the butter mixture in 2 additions, alternating with the buttermilk and vanilla. Stir just until evenly moistened. The batter will be slightly lumpy. NOTE: Never overmix muffin batter – just barely wet or incorporate the ingredients. Overmixing is the biggest mistake for “cone shaped” muffins.

Spoon the batter into the prepared muffin cups, filling each three-fourths full. Bake until the muffins are golden, dry and springy to the touch and a toothpick inserted into the center of a muffin comes out clean, 20 to 25 minutes. Transfer the pan to a wire rack and let cool for 5 minutes. Unmold the muffins and let stand until cool enough to handle.

To make the topping, in a small, shallow bowl, stir together the sugar and cinnamon (I usually do extra cinnamon because that’s how I like it). Put the melted butter in another small bowl. Holding the bottom of a muffin, dip the top into the melted butter, turning to coat it evenly. Immediately dip the top in the cinnamon-sugar mixture, coating it evenly. Transfer the muffin, right side up, to the rack. Repeat with the remaining muffins. Let cool completely before serving.

Makes 12 muffins.

9.28.2009

bruschetta

I know I’m, like, way behind the times in terms of popularity here but I can’t deny the fact that Julie & Julia was fantastic. So, so fantastic.


Since you’re here I assume you’re a food lover as much as me. I don’t know if it was just my pregnancy hormones or just simply the delicious appearance of the bruschetta that they ate in the movie, but I knew I just had to make it. Bruschetta is so easy, makes a pretty plate and always tastes good with fresh ingredients.

I don’t really have a “recipe” but here’s what I did, which will inevitably convince you of the simplicity of this divine meal, snack, appetizer, whatever you like.

step one: I sliced up four pieces of Rosemary Sourdough bread.
step two: Heated a couple of swirls of olive oil in a small skillet over medium high heat.
step three: “Browned” the bread until nicely toasted.
step four: Cut one clove of garlic in half and rubbed it on the bread just for a little flavor.
step five: Sliced small heirloom and cherry tomatoes (and de-seeded when needed – a rhyme!), fresh basil and seasoned with sea salt and freshly ground pepper.
step six: Spooned tomato basil mixture on top of bread and promptly devoured.

It was yum.

9.21.2009

fajita burgers

Summer is coming to a close. It seems this summer was extra long. I’m excited for long cardigans, scarves and stylish boots with skirts.

Before summer’s end though, David and I cooked up some Fajita Burgers the other night. They weren’t hard to make and I whipped up some fresh Hoagie Rolls to go with it which were quite good. Put together with some Grapefruit Sparkling Soda from Trader Joe’s and watermelon while sitting outside on the patio made for a nice, quiet, cool evening.

Fajita Burgers


1 pound lean ground beef
3/4 cup chopped fresh cilantro, divided
1/2 cup finely chopped red onion
1/4 cup chopped scallions
2 teaspoons minced garlic
1 tablespoon chili powder
1 teaspoon ground cumin
1/2 teaspoon dried oregano
1/2 teaspoon freshly ground pepper
1/4 teaspoon salt
1/3 cup reduced-fat mayonnaise
1 tablespoon lime juice
1/2 cup shredded or 4 slices Monterey Jack cheese
4 Hoagie Buns (see recipe below) split and toasted
2 Anaheim Peppers
1 cup shredded green cabbage
4 slices tomato
4 thin slices red onion

Preheat grill to medium-high and turn on oven broiler to high.

Wash Anaheim Peppers well and place on small cookie sheet. Place in the oven on the highest rack closest to the heat. Broil until charred (about 4 minutes), then flip over and broil until charred on the other side (about another 4 minutes). After fully charred on both sides, take out of oven and immediately place in a plastic bag. Close and let steam for about 5 – 6 minutes.

Meanwhile place beef, 1/4 cup cilantro, onion, scallions, garlic, chili powder, cumin, oregano, pepper and salt in a large bowl. Gently combine, without overmixing, until evenly incorporated. Form into 4 equal patties, about 1/2 inch thick and oval-shaped to match the rolls.

Combine the remaining 1/2 cup cilantro, mayonnaise and lime juice in a small bowl. Season with some salt and pepper.

Peel the roasted peppers, halve lengthwise and remove the seeds.

Oil the grill rack. Grill the burgers until an instant-read thermometer inserted in the center registers 165°F, about 6 minutes per side. Top with cheese and cook until it is melted, about 1 minute more. Assemble the burgers on toasted rolls with the mayonnaise, half a roasted pepper, cabbage, tomato and onion.

Hoagie Buns

2 cups warm water
4 teaspoons yeast
2 teaspoons sugar
¼ cup melted butter
1 teaspoon salt
4 ½ - 4 ¾ cups flour, or as needed

Dissolve yeast with water and sugar, add butter, salt, and flour. (It says to make a soft dough, but I don’t think it works well if it is too soft—the rolls flatten too much). Knead 8 - 10 minutes, rise 45 minutes, punch down and shape into a long loaf. Cut into 12 equal portions and roll into neat balls.

Place on greased baking sheets, score tops with a knife. Cover and rise about 30 minutes or until doubled. Brush tops with egg white wash (diluted with a little water), and bake 400 for 25 - 30 minutes. I bake them with steam to make them crunchy on the outside (place your broiler pan on the lower shelf while preheating the oven, and then pour a cup or so of water into it when you start to bake). Cool on wire racks if you want the bottoms crunchy as well.

9.15.2009

caesar chicken wrap

I know I’ve been out of commission for a long while on this food thing. And believe me, it’s not just on my blog that I’ve been “out of the kitchen”. Poor David has been suffering through a summer of quick pastas, sandwiches and lame leftovers – none of which are very exciting.

I’m really hopeful that once this baby comes, my appetite will return to normal. However, I’m not so hopeful that I’ll have the time or energy to create special meals like I did when it was just the two of us. But with or without the time, I’m dedicated to making this new balance between motherhood and wifehood a success.

I’m also dedicated to saying “so long” to the 30 pounds that pregnancy bestowed on me, so I hope to post more healthy and vegetable laden meals. I’m not going to lie and say that I won’t post the occasional treat here and there (because I can’t completely omit those – I’ve tried) but cutting back never hurt anyone.

Without further ado, let’s start with a delicious meal I made tonight – Caesar Chicken Wraps with Zucchini, Lettuce and Tomato. First of all, my sister (who claims she’s a horrible cook but is quite an accomplished baker) sent me the recipe for these wraps. I believe she adapted it from a King Arthur recipe. She spent a semester of college in Jerusalem and fell in love with the pita type bread they sold on the streets. These wraps remind her of them and I’m going to take her word for it. Two Notes: This a rather strange recipe but follow it. Also, the recipe may seem intimidating but if my sister – who has 4 rambunctious boys, a picky-eater husband, teaches piano lessons, designs custom garden landscapes and dislikes cooking – can do this, then so can you. She recommends making the dough before hand and keeping it in the refrigerator until you’re ready to use. I think that’s a great idea. She also had a bunch of other filling ideas (but more on that another time).

Caesar Chicken Wraps

Wrap Bread
2 cups unbleached all-purpose flour
1 1/4 cups boiling water
1/2 cup potato flakes
1 1/4 teaspoons salt
1 cup unbleached all-purpose flour
2 tablespoons vegetable oil
1 teaspoon instant yeast

Place 2 cups of flour in mixer. Pour the boiling water over the flour and stir till smooth. Cover and set the mixture aside for 30 minutes.

In a separate bowl whisk together the remaining ingredients. Add this to the cooled flour/water mixture, stir, then knead for about 5 minutes to form a soft dough. The dough should form a ball but will remain somewhat sticky. Add additional flour only if necessary; if kneading by hand, keep your hands and work surface lightly oiled.

Let the dough rise, covered, for 1 hour.

Divide the dough into 8 pieces (each about the size of a handball, around 3 ounces), cover, and let rest for 15 to 30 minutes.

Roll each piece into a 7" to 8" circle, and dry-fry them (without oil) over medium heat for about 1 minute per side, until they're puffed and flecked with brown spots. Adjust the heat if they seem to be cooking either too quickly, or too slowly (cooking too quickly means they may be raw in the center while too slowly will dry them out).

Transfer the cooked breads to a wire rack, stacking them to keep them soft. Serve immediately, or cool slightly before storing in a plastic bag.

Caesar Dressing
1 to 4 large cloves garlic, to taste, peeled and minced
2 tablespoons freshly squeezed lemon juice
2 tablespoons Dijon-style mustard
2 teaspoons Worcestershire sauce
1/4 cup sour cream
3/4 cup olive oil
1 cup grated Parmesan, Pecorino Romano, or aged Asiago cheese
1 teaspoon coarsely ground black pepper

Grilled Chicken-Vegetable Filling
1 pound boneless chicken breasts or thighs
1 large red bell pepper, seeded and quartered
1 large onion, peeled and sliced in 1/2" slices
1 medium zucchini, sliced crosswise into 1/4"-thick slices
Romaine Lettuce

To make the dressing: Stir together the minced garlic, lemon juice, mustard, Worcestershire sauce and sour cream. Whisk in the olive oil. Stir in the Parmesan cheese and ground black pepper. You may do all of this in the food processor by processing together the garlic, lemon juice, anchovy or Worcestershire sauce, and sour cream. Drizzle the olive oil through the feed tube with the motor running, then gently pulse in the Parmesan and black pepper. Set the dressing aside. Refrigerate it if you're not going to use it within an hour or so.

To make the filling: Grill the chicken and vegetables over medium coals until done (or sauté them in a skillet). Cool, then slice the chicken and cut the vegetables into bite-size pieces. Place a lettuce leaf on each bread. Spoon some of the filling down the center, atop the lettuce. Top with dressing, wrap and serve immediately.

6.22.2009

greek quinoa burgers

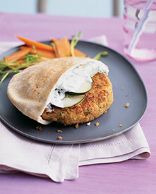
Kelly over at my happy life is working on a goal to eat healthier (shouldn’t we all?) and she requested a few recipes to help her get inspired. One of my favorite healthy recipes is for Greek Quinoa Burgers. They are so good they shouldn’t count as “healthy”. I don’t care if you don’t like quinoa because you’ve never had it like this before. It is super good for you since it’s a complete protein filled with iron, zinc, magnesium and other vitamins. Plus, it’s super easy to cook. It’s a super food! So, without further ado, here’s the recipe:

Greek Quinoa Burgers

1/2 cup rinsed quinoa
1 medium carrot, cut in chunks
6 scallions, thinly sliced
15 ounces great northern beans, drained and rinsed
1/4 cup plain dried breadcrumbs
1 large egg, lightly beaten
1 tablespoon ground cumin
Coarse salt
Ground pepper
2 tablespoons olive oil
1/2 cup plain nonfat Greek yogurt
1 tablespoon fresh lemon juice
4 pitas (each 6 inches)
1/2 English cucumber, thinly sliced diagonally

In a small saucepan, bring 3/4 cup water to a boil; add quinoa, cover, and reduce heat to low. Cook until liquid is absorbed, 12 to 14 minutes; set aside.

In a food processor, pulse carrot until finely chopped. Add cooked quinoa, half the scallions, beans, breadcrumbs, egg, cumin, 1 teaspoon salt, and 1/4 teaspoon pepper; pulse until combined but still slightly chunky.

Form mixture into four 3/4-inch-thick patties (dip hands in water to prevent sticking). If too soft, refrigerate 10 minutes to firm. In a large nonstick skillet, heat oil over medium; cook burgers until browned and cooked through, 8 to 10 minutes per side.

Meanwhile, in a small bowl, combine yogurt, lemon juice, and the remaining scallions; season with salt and pepper. Serve burgers in pita topped with cucumber and yogurt sauce.

1.12.2009

chicken & dumplings

when david and I went to hawaii for our first anniversary we took a shuttle to and from the airport. it was an adventure in, and of, itself but that story is for another day. we met a few interesting people on these shuttles, including a middle-aged man and his wife from canada. they were very nice and we started to chat about this and that . . . and then they found out I went to culinary school. immediately they turned to david.

man: "so, what's your favorite thing that your wife cooks?" (classic question)
david: "everything she makes is good." (good answer)
wife: "don't you have a favorite? something that you like the best?" (very eager for tips)
david: "well . . . she makes really delicious chicken and dumplings."

I. was. shocked.

I mean, really? really? I made chicken and dumplings once in our year of marriage and I didn't even know he really liked it. needless to say, I started making chicken and dumplings a lot more. and by golly, they are good!

behold - the perfect comfort food.
chicken and dumpling
3 Tablespoons butter
1 medium onion, large dice
5 medium carrots, large dice
1/2 teaspoon dried thyme
1 cup (spooned and leveled) all-purpose flour
1 can (14.5 ounces) reduced-sodium chicken broth
Coarse salt and freshly ground pepper
1 1/2 pounds boneless, skinless chicken thighs, cut into 2-inch pieces
3/4 teaspoon dried dill weed
1 3/4 teaspoons baking powder
1/2 cup plus 2 Tablespoons milk
1 package (10 ounces) frozen peas

In a Dutch oven (or a heavy 5-6 quart pot), heat butter over medium heat. Add onion, carrots, and thyme. Cover and cook, stirring occasionally, until onion is soft, about 5 minutes. Add 1/4 cup flour and cook, stirring, 30 seconds. Add broth and bring to a boil, stirring constantly; season with salt and pepper. Nestle chicken in pot; reduce heat to medium-low. Cover and cook, stirring occasionally, 20 minutes.


Meanwhile, make dumplings: In a medium bowl, whisk together remaining 3/4 cup flour, dill, baking powder, and 1/2 teaspoon salt. With a fork, gradually stir in 1/2 cup milk to form a moist and soft batter. It should be just a little thicker than pancake batter and should easily drop from the tip of a spoon. (Add additional 2 tablespoons milk if too thick.) Set aside.


Stir peas into pot. Drop batter in simmering liquid in 10 heaping tablespoonfuls, keeping them spaced apart (dumplings will swell as they cook). Cover, and simmer until chicken is tender and dumplings are firm, 20 minutes. Serve.

12.09.2008

the ungreasy taco

you guys, you guys! I'm so excited about this little trick I learned today from eating well. so, david loves greasy tacos. gross right? but then again, not really because they're really good sometimes. he's from southern california which pretty much equals greasy mexican food, hence the loving of greasy tacos. unfortunately, the devotion to this oily delicacy is not exactly conducive with our plan to lose weight . . . enter a baked alternative.
here's how it works. instead of firing up the old frying pan and filling it with canola oil, you heat your oven to 375 and spray those corn tortillas with canola oil cooking spray. then sprinkle it with chili powder and some kosher salt and drape them over a bar of your oven rack so that it creates a taco shell (bake for 7 - 10 minutes). so genius!

the ungreasy taco

12 Crispy Taco Shells (recipe above)
Lean & Spicy Taco Meat (recipe follows)
3 cups shredded romaine lettuce
3/4 cup shredded reduced-fat Cheddar cheese
3/4 cup diced tomatoes
3/4 cup prepared salsa
1/4 cup diced red onion

To assemble, fill each taco shell with (in any order): a generous 3 tablespoons taco meat, 1/4 cup lettuce, 1 tablespoon cheese, 1 tablespoon tomato, 1 tablespoon salsa, 1 teaspoon onion.

lean & spicy taco meat

8 ounces 93%-lean ground beef
8 ounces 99%-lean ground turkey breast
1/2 cup chopped onion
1 10-ounce can diced tomatoes with green chiles, preferably Rotel brand (see Shopping Tip), or 1 1/4 cups petite-diced tomatoes
1/2 teaspoon ground cumin
1/2 teaspoon ground chipotle chile or 1 teaspoon chili powder
1/2 teaspoon dried oregano

Place beef, turkey and onion in a large nonstick skillet over medium heat. Cook, breaking up the meat with a wooden spoon, until cooked through, about 10 minutes. Transfer to a colander to drain off fat. Wipe out the pan. Return the meat to the pan and add tomatoes, cumin, ground chipotle (or chili powder) and oregano. Cook over medium heat, stirring occasionally, until most of the liquid has evaporated, 3 to 6 minutes.

11.14.2008

pumpkin bread + mulled cider

so here’s the deal. it is 83 degrees today because I live in a barren wasteland. I should be “grateful” you say because I don’t have to deal with snow or ice or scraping windshields? well, tell me that in february when you’re all sick of the snow and it’s still 80 degrees here in arizona. the holidays are supposed to be cold so you can feel warm inside from all the holiday love and cheer. that was cheesy but I don’t care! I mean it!

(deep breath)

in any case, the smell of pumpkin baking always puts one in a cheerful holiday mood (which I apparently need badly) - that and the smell of hot mulled cider. so here’s both:
pumpkin bread
2 cups canned pumpkin
1 cup canola oil
4 eggs
2/3 cup water
3 cups granulated sugar
3 ½ cups all-purpose flour
1 teaspoon cinnamon
1 teaspoon nutmeg
½ teaspoon salt
2 teaspoons baking soda
2 cups semi-sweet chocolate chips

Preheat oven to 350 degrees. Lightly spray three (medium/smallish) bread loaf pans.

In a large bowl, combine pumpkin, oil, eggs, water and sugar. Sift in flour, cinnamon, nutmeg, salt and baking soda. Beat gently until batter is smooth, then gently add chocolate chips and mix until just incorporated. Pour batter into loaf pans until halfway full. Bake in preheated oven for one hour or (depending on your loaf pan – see note) until a toothpick inserted in the middle comes out clean.

Remove from oven and let cool for a couple of minutes. Remove from pan and let cool completely before slicing. Optional: You can also lightly butter the tops and dredge with powdered sugar.

note: if you don’t have small loaf pans, you can use two medium or one large loaf pan. just be sure that the batter only comes halfway up the sides of the pan. you should also increase the cooking time a few minutes until a toothpick inserted in the center comes out clean.
mulled cider
1 orange, washed
4 cups (1 quart) apple juice or cranberry juice cocktail
2 cinnamon sticks
4 whole cloves

Peel the orange by slicing into strips. Combine your juice of choice, orange peel, cinnamon sticks and cloves in a saucepan. Place the saucepan over medium heat and warm the juice until tiny bubbles appear around the edges of the pan. Simmer gently for 20 minutes, reducing the heat as needed to keep the juice from boiling. Remove the pan from the heat. Pour into mugs and serve immediately.

11.03.2008

oatmeal cookie cinnamon ice cream

so, basically, it’s november and I’m blogging about ice cream. but this is no ordinary ice cream, sister. it's actually perfect fall ice cream. for example, don’t you make oatmeal cookies in the fall more than any other time? I do. don't you also love things with cinnamon in the fall more than any other time? I do. so, without further ado, I give you my version of the best ice cream on the planet:oatmeal cookie cinnamon ice cream

4 cups half and half
1 cup sugar
Pinch of Kosher salt
5 egg yolks
2 teaspoons freshly ground cinnamon
4 oatmeal cookies (need to be homemade and soft), crumbled

In a non-reactive saucepan, combine the half and half, sugar and salt over medium heat. Bring the cream to a boiling point and scald it. Remove from the heat.

Beat the egg yolks and cinnamon in a bowl. Add the half and half mixture, about ¼ cup at a time, to the beaten eggs, whisking in between each addition, until all is used. Pour the mixture back into the saucepan and cook, stirring, over medium heat for about 2 to 3 minutes or until the mixture becomes thick enough to coat the back of a spoon. Remove from the heat and cool completely in an ice bath. Pour the mixture into the ice cream machine and follow the manufacturer’s instructions for churning time.

While the ice cream is churning, crumble the cookies into small bite-sized pieces. After the ice cream is thick and finished churning, gently add the pieces of cookies.

note: I also suspect that you could use your leftover gingersnaps in this recipe instead of oatmeal cookies and it would be fab. whoa, I might have to try this!

10.30.2008

spooky finger pretzels

some people have been asking for the "lady finger" pretzels I made for the halloween spook fest. they were surprisingly easy and tasted great! they definitely should be eaten the same day though. I served them with warm queso and marinara sauce - they were a halloween hit!

if you need extra help, you can watch martha's tutorial here.

spooky finger pretzels

red or green food coloring (optional, for fingers)
24 blanched almonds, halved lengthwise
2 cups warm water (110 degrees), plus 3 quarts, plus 1 Tablespoon
1 Tablespoon sugar
2 1/4 teaspoons active dry yeast
Vegetable oil
5 to 6 cups all-purpose flour, plus more for work surface
1 Tablespoon coarse salt
2 Tablespoons baking soda
1 large egg
Sea salt
Fried rosemary (optional, for toes)


Place a small amount of food coloring, in a shallow bowl, and, using a paintbrush, color the rounded side of each split almond; set aside to dry.

Pour 2 cups water into the bowl of an electric mixer fitted with the dough-hook attachment. Add sugar; stir to dissolve. Sprinkle with yeast, and let stand until yeast begins to bubble, about 5 minutes. Beat in 1 cup flour into yeast on low speed until combined. Beat in coarse salt; add 3 1/2 cups flour, and beat until combined. Continue beating until dough pulls away from bowl, 1 to 2 minutes. Add 1/2 cup flour. Beat 1 minute more. If dough is sticky, add up to 1 cup more flour. Transfer to a lightly floured surface; knead until smooth, 1 minute.

Coat a large bowl with cooking spray. Transfer dough to bowl, turning dough to coat with oil. Cover with plastic wrap; let rest in a warm spot to rise until doubled in size, about 1 hour.

Preheat oven to 450 degrees. Bring 3 quarts water to a boil in a 6-quart straight-sided saucepan over high heat; reduce to a simmer. Add baking soda. Lightly coat two baking sheets with cooking spray. Divide dough into quarters. Work with one quarter at a time, and cover remaining dough with plastic wrap. Divide first quarter into 12 pieces. On a lightly floured work surface, roll each piece back and forth with your palm forming a long finger shape, about 3 to 4 inches. Pinch dough in two places to form knuckles. Or, to make toes, roll each piece so that it is slightly shorter and fatter, about 2 inches. Pinch in 1 place to form the knuckle. When 12 fingers or toes are formed, transfer to simmering water. Poach for 1 minute. Using a slotted spoon, transfer fingers to the prepared baking sheets. Repeat with remaining dough, blanching each set of 12 fingers or toes before making more.

Beat egg with 1 Tablespoon water. Brush pretzel fingers and toes with the egg wash. Using a sharp knife, lightly score each knuckle about three times. Sprinkle with sea salt and rosemary, if using. Position almond nails, pushing them into dough to attach. Bake until golden brown, 12 to 15 minutes. Let cool on wire rack.